Defining a Transition
A transition defines a condition specifying when the next step is executed. The definition of a transition may also include an action to be performed when the transition is triggered and before going to the next step.
The starting point of a workflow also has a transition defined for it that specifies when the workflow commences.
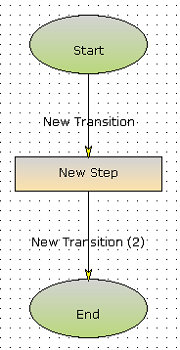
Only one transition can be drawn between two step boxes. However, a step box in a workflow can be connected to multiple step boxes, each by a single transition line; and vice versa, multiple transition lines can connect to a single step, each from a different step box.
A simple example is shown below:
If a step box has more than one transition, then the priority of these transitions must be defined, in order to specify which one is performed if they occur simultaneously. Higher priority transitions take precedence over lower priority ones.
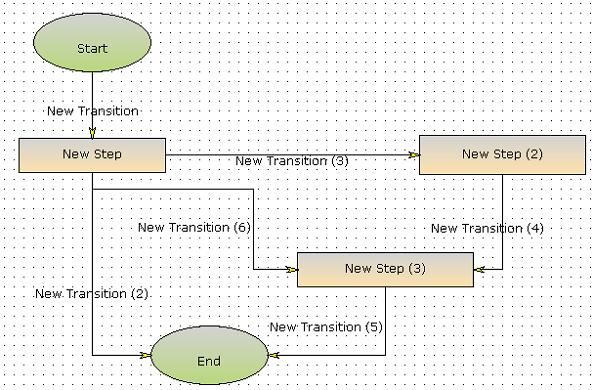
A workflow also contains a single starting point and a single ending point.
To define a transition:
| 1. | Click New Transition on the ribbon to define a new transition. The cursor changes to a + (Plus) sign. |
| 2. | Click in the work area and drag and draw a line from one step box to another: |
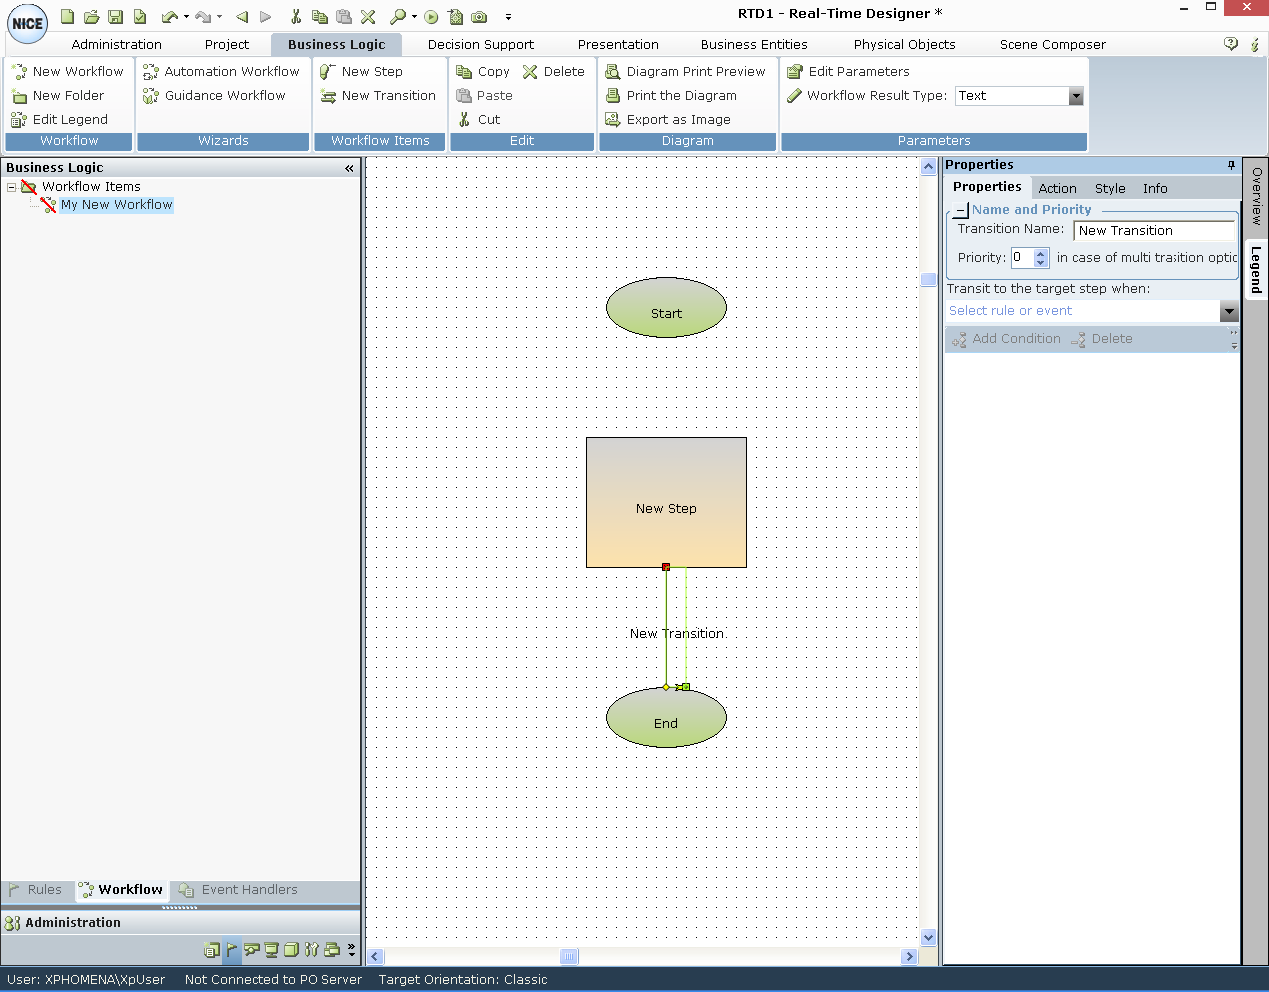
This line represents a transition that defines a condition specifying when the next step should be executed. Its properties are shown in pane to the right.
| 3. | While the transitions line in the workflow diagram is selected, define the properties of this transition, as follows: |
In the Properties tab:
Transition name: Enter a name for the transition.
Priority: If a step box has more than one transition coming out of it, then the priority of these transitions must be defined. The priority specifies which transition is performed if a rule or event of more than one transition is triggered simultaneously. The Queue Interval property under the Real-Time Client settings in the System Settings window defines this behavior.
Transit to the Target Step When: Specifies the rule or event that defines when to transition from the Source Step box to the Target Step box. When this workflow step is activated on an agent's computer in real time, it will wait until the transition's event occurs or the rule's condition is fulfilled. By default, a new transition is set to Always, meaning that the workflow will automatically transition to the target step when the source step is complete, without waiting.If there is more than one transition path, then Always follows the rules for priorities.
You can also define a new rule on-the-fly that applies only to this transition. To do so, select Transition Rule in the drop-down list and then define the condition that must occur to trigger this rule.
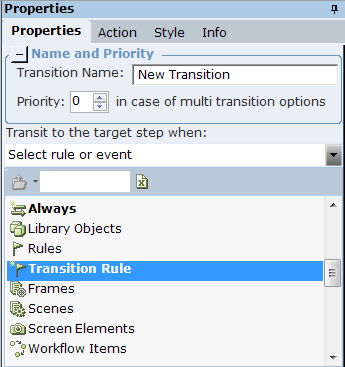
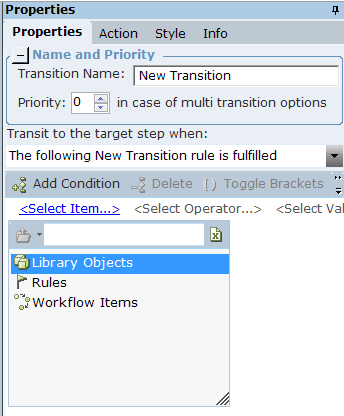
To define the condition, click Add Condition and then define the condition. See Action Editor for more information.
In the Action tab:
When in transit do the following: Specifies that the action that you define in the instruction below is performed as long as this step is not transitioned to another step, meaning until the rule, event, or condition defined above is met. When you select this checkbox, the transition line becomes thicker to indicate that it involves an action.
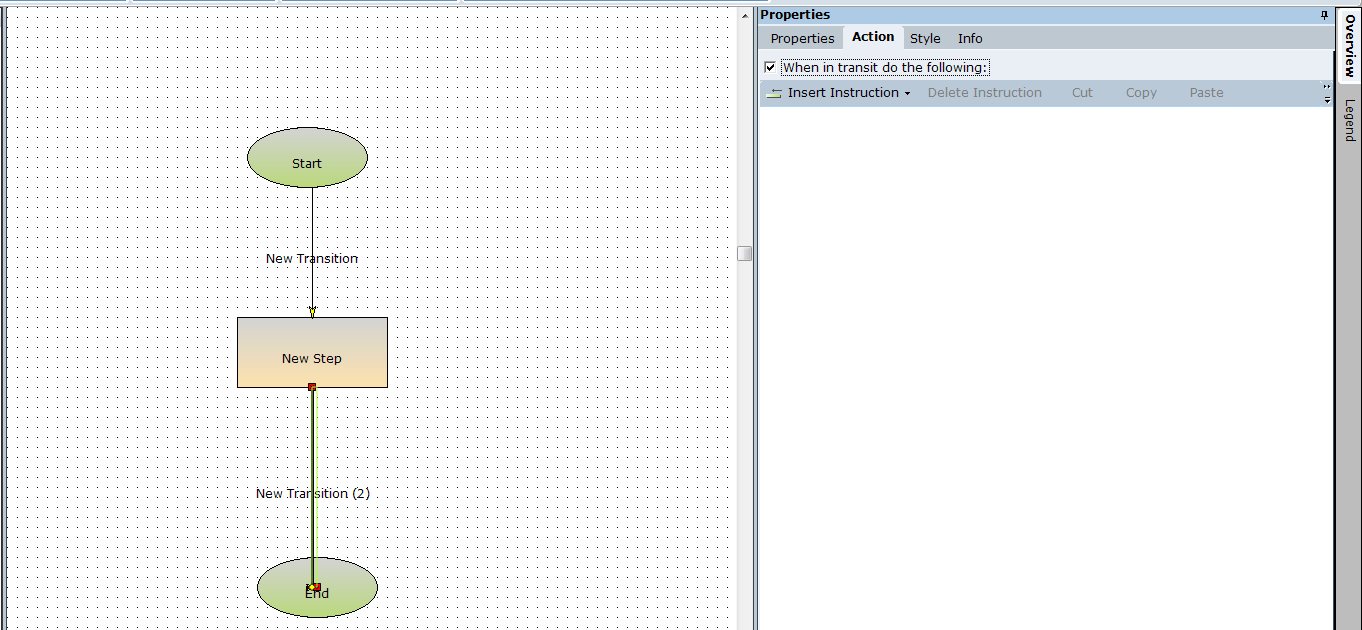
When a transition line that involves an action is selected in a workflow, the line is dark green. When a transition line that involves an action is not selected in a workflow, the line is black. Transition lines involving actions have a thicker line than other transition lines.
Insert Instruction: Enables you to define an action to be performed is this step. See Action Editor for more information.
In the Style tab:
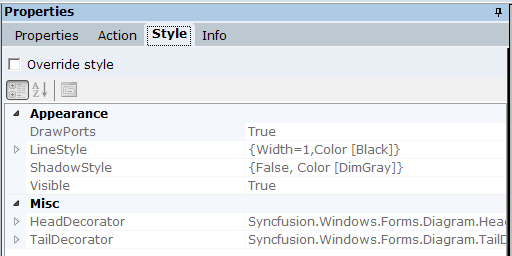
Override style: When selected, overrides the default appearance of the selected transition line. This tab only appears when you select a transition line in the work area.
The other design properties in this tab specify how the transition line should appear, including its width, shadow style and so on.
In the Info tab:
Author/Created By/Modified By/Modified: Shows general information about this transition, such as who created it, and when and who modified it and when.
Public: Declaring any of these as public creates an interface for other projects so that it can be accessed by another project for which a reference to this project was defined. See Public and Private Data in Real-Time Designer
Description: Enables you to enter text that describes this step.
When searching for an item or looking at the Referenced By attribute in the Info tab, Real-Time Designer shows the full object path to the object, including the containing module and the containing project.
