In the Screen Elements tree, you can select each level of a captured screen element’s hierarchy to display the details automatically detected by the Real-Time Designer in the Identification tab.
The Terminal Emulation connector supports the following HLLAPI screen element types:
HLLAPI Edit
HLLAPI Screen
HLLAPI Session
Terminal Process
To view HLLAPI Edit screen element details:
| 1. | In the Screen Elements tree, select the screen element and click the Identification tab: |
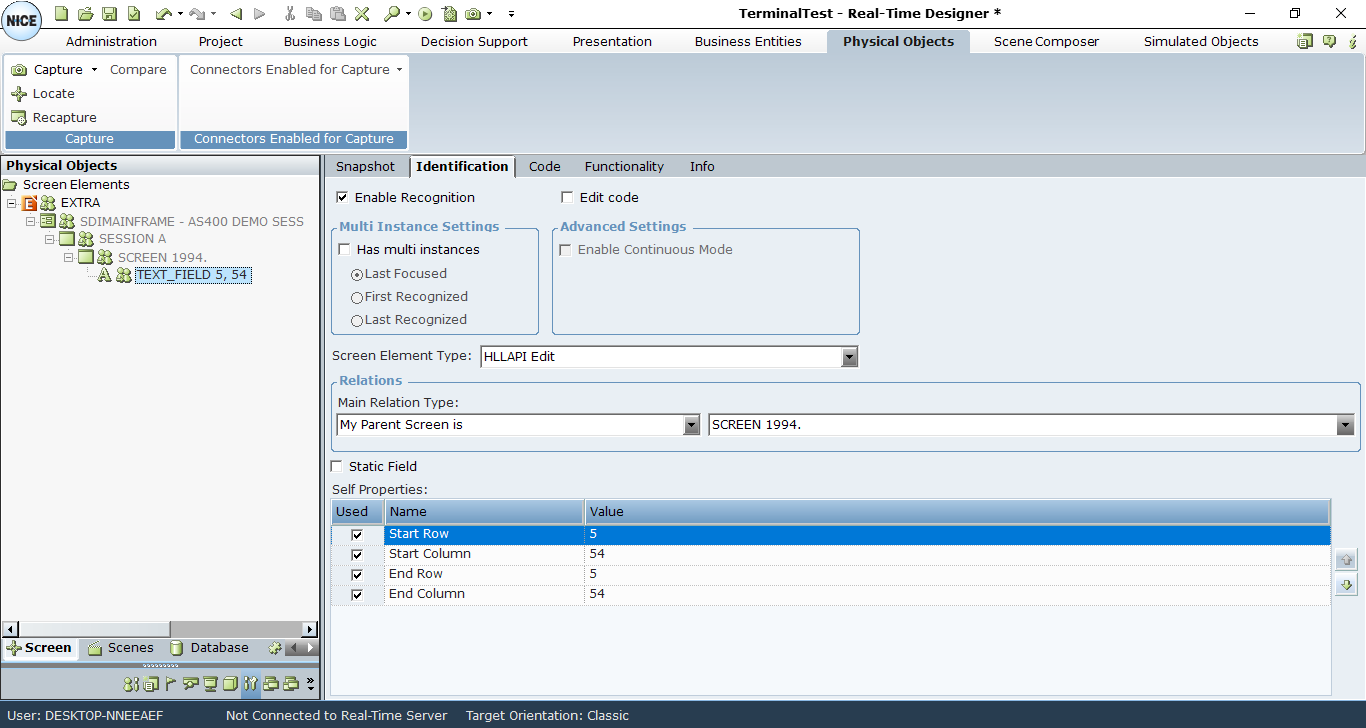
| 2. | The Real-Time Designer automatically identifies the type of screen element as HLLAPI Edit, and displays it in the Screen Element Type drop-down list. This is the only type that appears in the list. |
| 3. | The Main Relation Type drop-down list includes only the My Parent Screen is option and shows the parent object of the captured HLLAPI Edit control. |
| 4. | To specify that the captured HLLAPI Edit object is a static cell in the Terminal application and cannot receive the value, select the Static Field checkbox. |
| 5. | The Self Properties section lists the properties that can be used to uniquely identify the HLLAPI Edit screen element type. The Real-Time Designer automatically selects the best properties to identify screen elements, and selects them in the Used column. |

Start Row: The number of the row where the HLLAPI cell starts.
Start Column: The number of the column where the HLLAPI cell starts.
End Row: The number of the row where the HLLAPI cell ends.
End Column: The number of the column where the HLLAPI cell ends.
The default order of the Self properties for these screen elements cannot be changed in the System Settings window.
For HLLAPI Edit screen elements, all four self properties are automatically selected for identification.
| 6. | To determine if the HLLAPI Edit object might have multi instance objects, click the Has multi instances checkbox . |
Has multi instances checkbox is clear by default if you captured a HLLAPI Edit screen element.
For more details how to activate the multi instance feature, see Multiple Instances of the Same Application
To view details of HLLAPI Screen screen element:
| 1. | In the Screen Elements tree, select the HLLAPI Screen screen element, and click the Identification tab. |
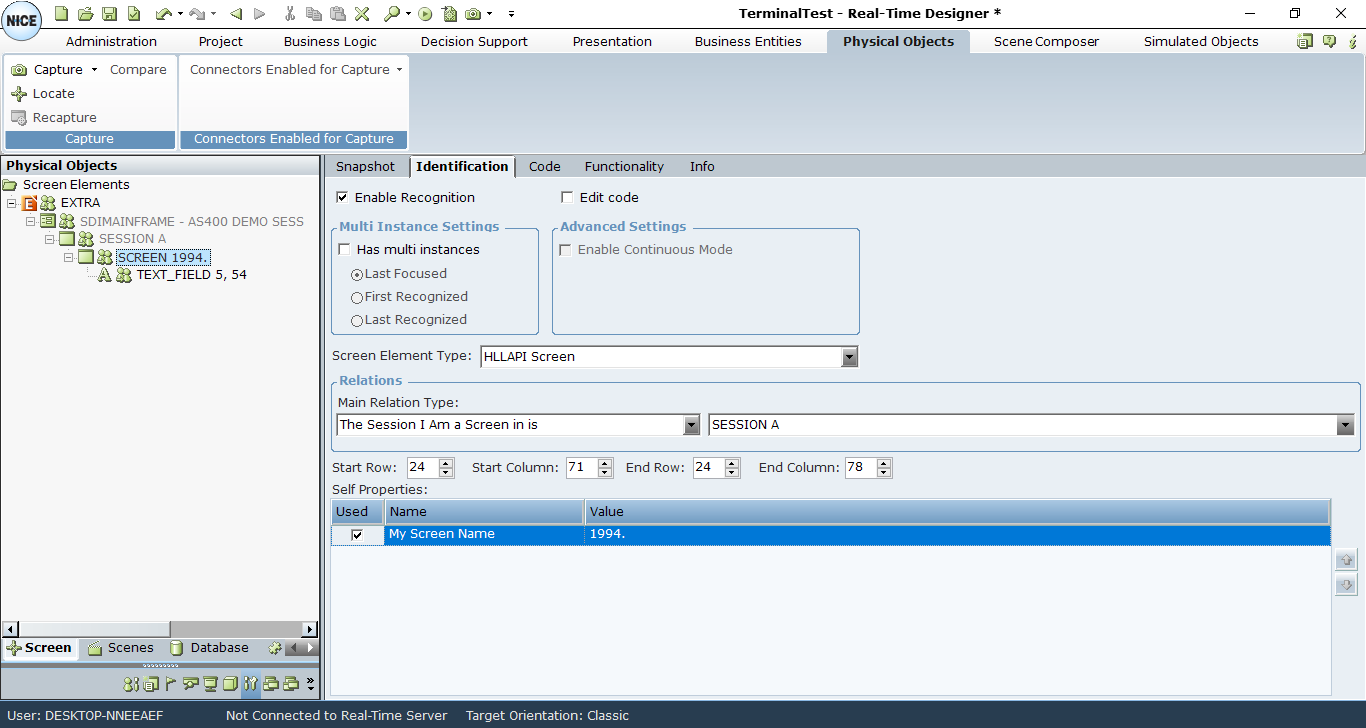
To select a HLLAPI Screen screen element you need to display hidden captures, as described inCapturing an HLLAPI Screen Element
| 2. | The Real-Time Designer automatically identifies the type of screen element as HLLAPI Screen, and displays it in the Screen Element Type drop-down list. This is the only type that appears in the list. |
| 3. | The Main Relation Type drop-down list includes only the The Session I Am a Screen in is option, which shows the parent object (session) of the captured HLLAPI Screen control. |
| 4. | The Self Properties section lists the My Screen Name property that can be used to uniquely identify the HLLAPI Screen screen element type. |
| 5. | If you need to customize the size of the HLLAPI Session screen element, change the values in the Identification tab that defines the area of the session itself. |

Real-Time Designer handles the area of the Terminal’s session automatically when capturing a HLLAPI object.
| 6. | Select the Has multi instances checkbox to determine if the HLLAPI Screen object has multi instance objects. |
Has multi instances checkbox is clear by default if you captured a HLLAPI Edit screen element.
To view HLLAPI Session screen element details:
| 1. | In the Screen Elements tree, select the HLLAPI Session screen element, and select the Identification tab. |
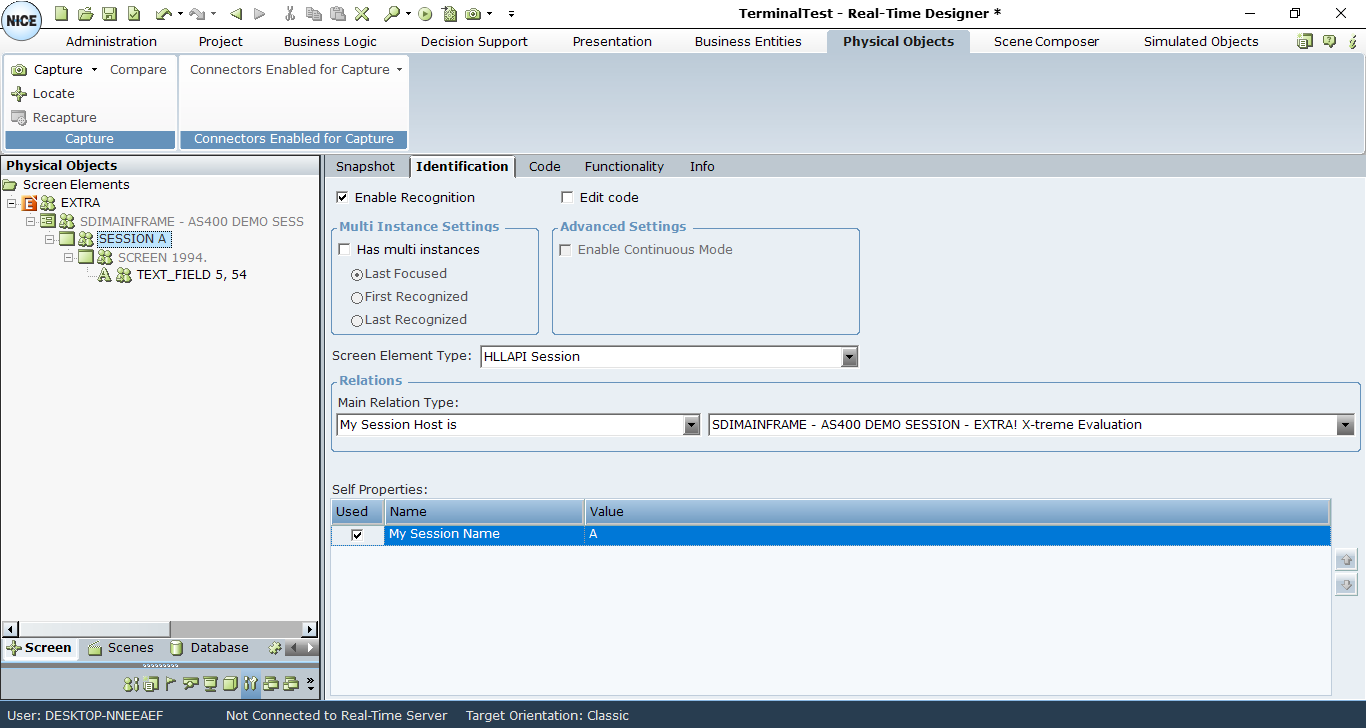
To select a HLLAPI Session screen element, you need to display hidden captures, as described inCapturing an HLLAPI Screen Element.
| 2. | The Real-Time Designer automatically identifies the type of screen element as HLLAPI Session, and displays it in the Screen Element Type drop-down list. This is the only type that appears in the list. |
| 3. | The Main Relation Type drop-down list includes only the My Session Host is option, which shows the parent object of the captured HLLAPI Session control. |
| 4. | The Self properties section includes the My Session Name self property that is used to uniquely identify a HLLAPI Session screen element. |
| 5. | Select Has multi instances to specify that a HLLAPI Screen object has multi instance objects. |
Has multi instances is not selected by default if you captured a HLLAPI Edit screen element.
For more information about using multi-instances functionality, see Multiple Instances of the Same Application.
To view Terminal Process screen element details:
| 1. | In the Screen Elements tree, select the Process Screen element, and click the Identification tab. |
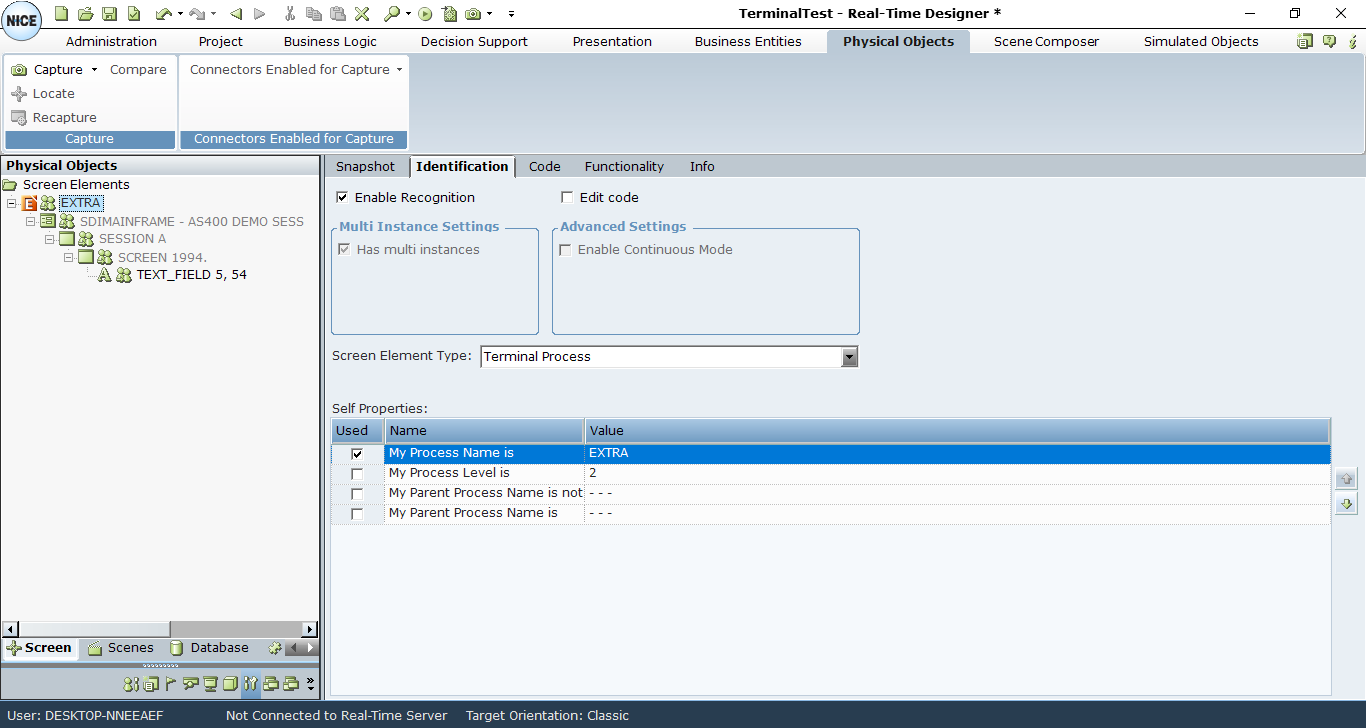
The Relations section does not appear for a Process screen element type.
| 2. | The Real-Time Designer automatically identifies the type of screen element as Terminal Process, and displays it in the Screen Element Type drop-down list. This is the only type that appears in the list. |
| 3. | The Self Properties section includes the properties that are used to uniquely identify the process. |
My Process Name is: Provides the name of the process of Terminal application in the process tree.
You can use the Process Explorer utility (or standard Windows Task Manager) to verify the name of the process.
My Process Level is: Specifies the level of the process in the process tree, thereby enabling you to handle scenarios where applications have more than one process on different levels.
You can use the Process Explorer utility to verify the process level.
My Parent Process Name is not: Provides the name of the process, which cannot be a parent process (the process one level higher).
My Parent Process Name is: Provides the name of the process, which is the parent process (the process one level higher).