Defining a Workflow
To define a new workflow:
| 1. | Click the Business Logic tab at the top of the window and then click the Workflow tab to display the Workflow definition window. |
| 2. | Click New Workflow to add a New Workflow branch under the Workflow Items branch. |
The New Workflow branch is selected by default.
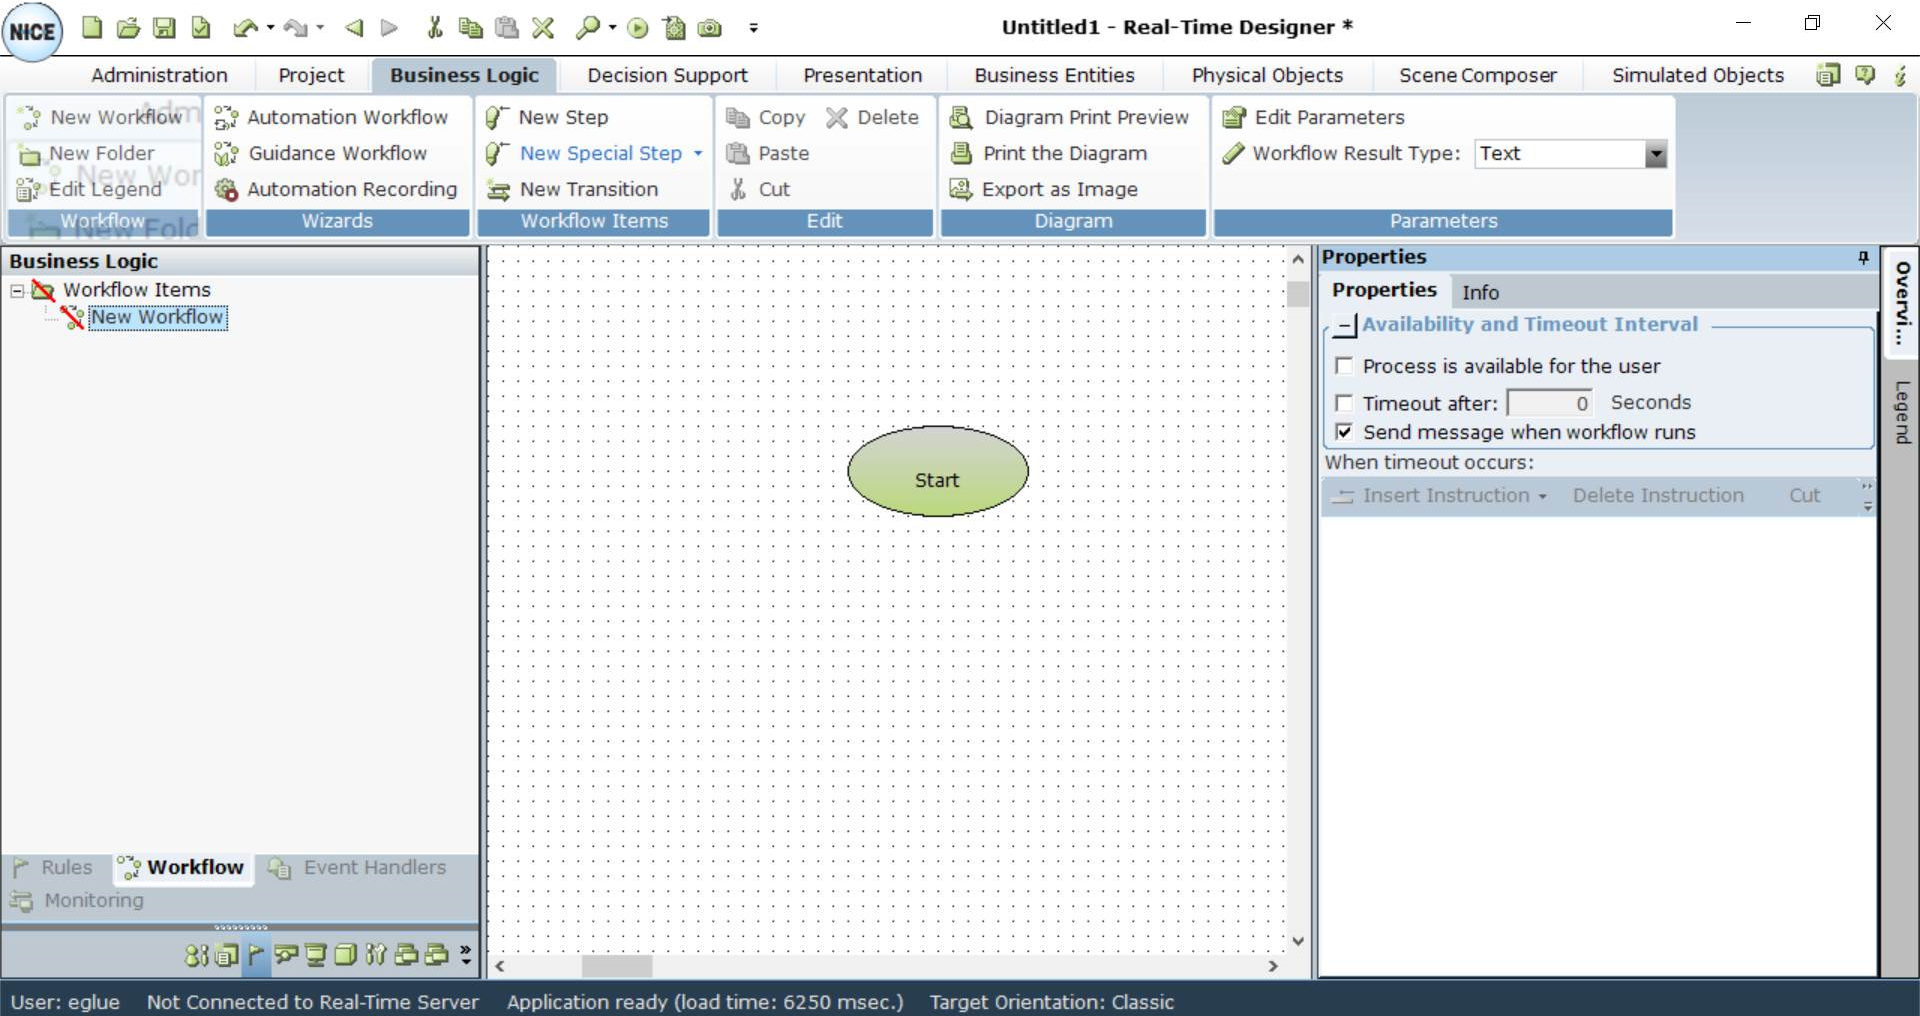
You can rename an item in the tree by selecting it and typing in a new name.
| 3. | Create your workflow by adding steps and transitions. For details, see Defining a Step and Defining a Transition |
| 4. | In the Properties pane, define the properties of this workflow: |
Timeout after x Seconds: Specifies the amount of time that a workflow should wait for an external application to react, such as to display a pop-up. After this amount of time, the workflow stops waiting and then performs the actions that are defined in the area below it. To define the action to be performed, click Insert Instruction.
Send message when workflow runs: Specifies whether or not to send a Desktop Automation task message (Start, End and Exceptions) to APA Server when the workflow runs. If the workflow message is disabled, the task does not appear in the Automation Portal. If this option is disabled, Desktop Automation Task Messaging is turned off appears in the log file.