Importing Selected Application/Page Names into Display Names Table
You can import pre-existing applications and pages into the Desktop Analytics Module. These applications and pages are imported from the Client machines.
By importing pre-existing applications and pages into the Desktop Analytics Module, the administrator can quickly fill the Display Names Root folder tree with raw data, and then easily update the imported applications and pages using the Display Names option.
When importing, Real-Time Designer creates an automated list of generic Display Names as a mapping suggestion. This enables you to view duplications and optionally select the suitable pattern for unifying similar applications into the minimum number of Display Names. This eliminates redundant Display Names.
The unmapped application names are grouped together under a common node using the wildcard. For example:
*.EBAY.COM
PAY.EBAY.COM
CHECKOUT.EBAY.COM
WWW.EBAY.COM
If more than one wildcard is added the child nodes reflect the nested generic Display Names respectively. For example:
*.NICE.CO*
*.NICE.COM
NICEWEB.NICE.COM
VLAB.NICE.COM
SOMETHING.NICE.CO.IL
To import selected Applications/Pages into the Display Names table:
| 1. | In the Real-Time Designer, navigate to Administration tab > Desktop Process Monitor > Display Names. |
| 2. | In the Root folder pane, click  . . |
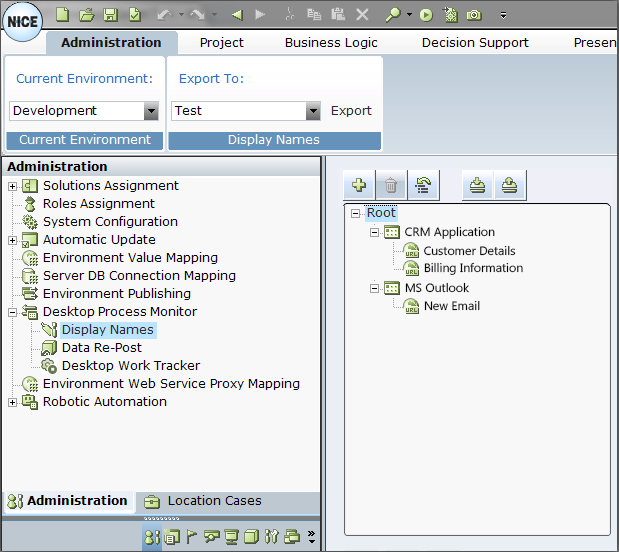
The Import Display Names window appears.
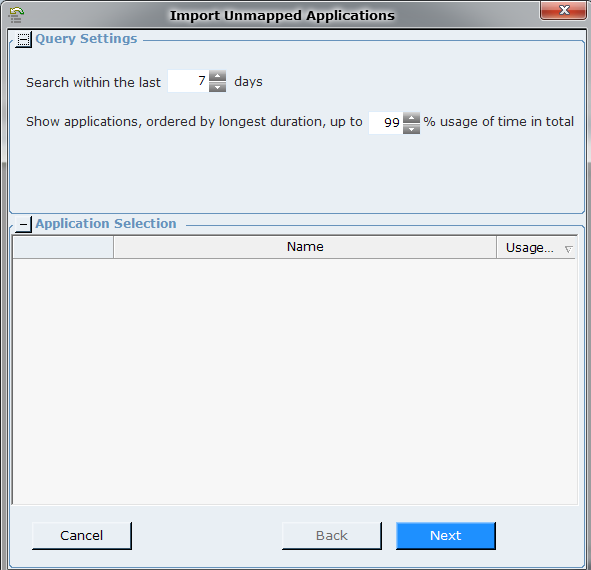
| 4. | Define the percentage in the Show applications, ordered by longest duration, up to X% usage of time in total option. This will include the applications with the highest durations accumulated up to the percentage specified. The default is 99. |
| 5. | Click Next. |
The list of selected applications and pages appears in the Application Selection area.
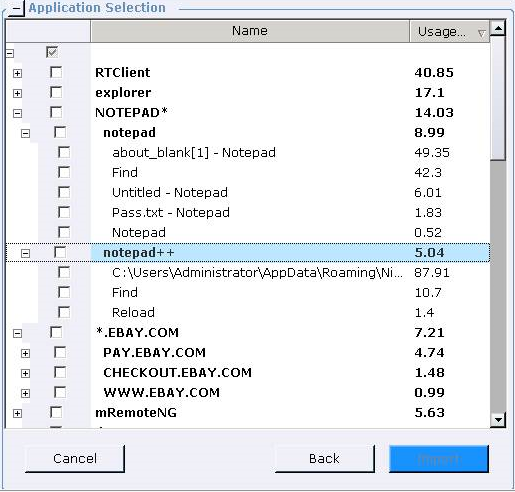
Only pages that do not yet already appear in the Root will appear in the Application Selection area.
You can sort the applications and pages by name or by usage by clicking on the column header.
| 6. | Click Back to change your selection of the number of days or percentage of applications. |
| 7. | Select the relevant applications and pages. |
If an application is not expanded in the tree, and you select the application, only the application (but none of its pages) is selected.
If you expand the application in the tree, and then select the application, the application AND all its pages are selected.
If you select a page, the application is automatically selected.
| 8. | Click Import to import the selection to the Root folder. |
The Root folder tree is updated with the selected Applications and Pages.