Configuring a Manual Process (Desktop Work Tracker)
Manual processes are an integral feature of Desktop Work Tracker and are designed to allow you to manually insert processes into the system from your desktop.
This section describes how to set up and configure a manual process. You will not need to define any tasks for manual processes, since the tasks are created in the background and defined automatically.
To configure a manual process for monitoring in Real-Time Designer:
| 1. | Click the Business Logic module tab. |
| 2. | In the Processes tree, select Manual Processes and then click  . or . or |
Right click Manual Processes and select Add > New Manual Process from the popup menu:

A new manual process is added to the tree.
| 3. | Rename the process. |
If a queue tag is NOT specified, the process name must have 64 or fewer characters and must not include spaces or tabs.
| 4. | Define the properties of the process: |
If specified, a queue tag must have 64 or fewer characters and must not include spaces or tabs. This limitation is required when sending process information to Workforce Management (WFM).
If the process information is not being sent to WFM and you require more than 64 characters in the queue tag, use a text business entity in the queue tag instead of a static value. The business entity and its initial value can include more than 64 characters.
| b. | For our scenario, select Business Entities > Message Orientation in the drop-down list. |
The Message orientation value means that the email type can be determined directly from the email itself. In effect, this selection extracts the prefix of the email address in the To field of an email, up to the @ sign in the address. The extracted prefix is then used to tag (categorize) emails by type, so that email handling time for different email types can be counted separately.

| 5. | Specify the Linked Data Collection Activity value. |
When you select Data Collection in the process Properties, the Activate and Collect functions are triggered behind the scenes when the process’s stop trigger is triggered.

| 6. | Click the down arrow in the Linked Data Collection Activity field to define its value. Only one data collection activity can be selected. |

For details about how to define data collection, see Defining Data Collection in the Real-Time Designer User Guide,
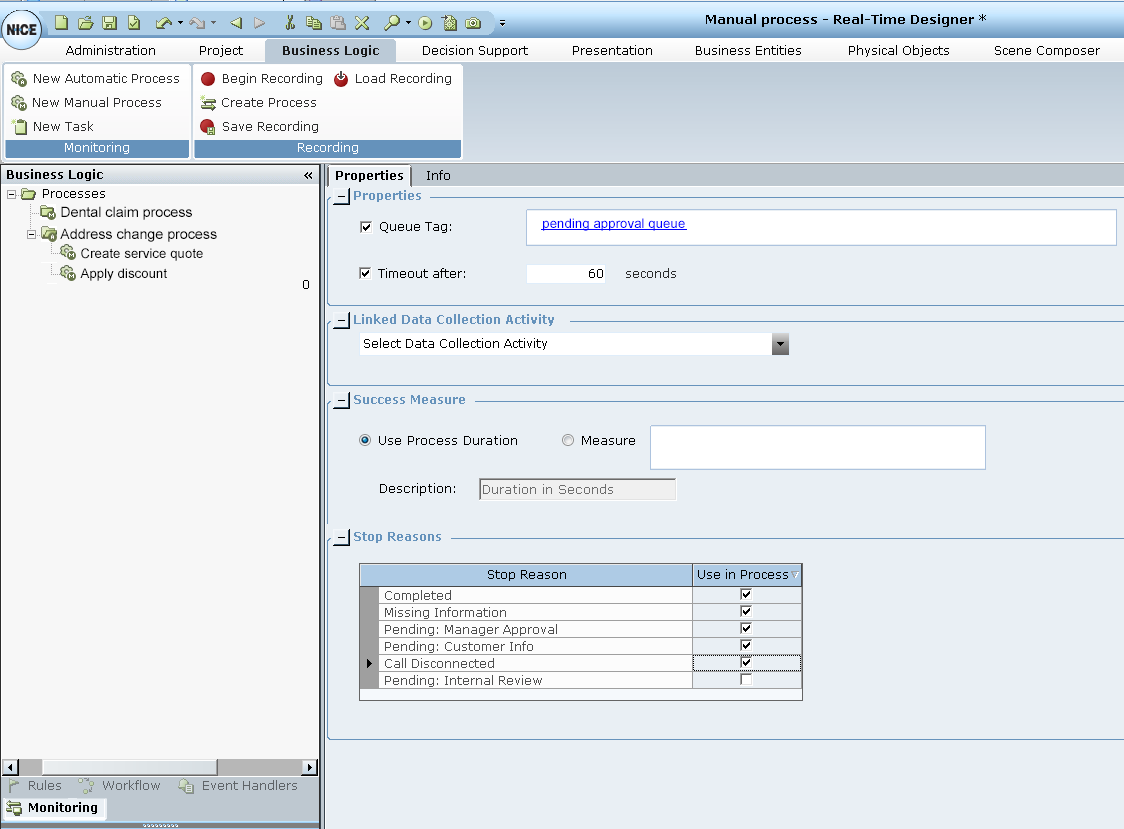
| 7. | In the Success Measure area, select Measure value and data source. |
The Success Measure area enables you to specify a measure value, thereby providing additional performance information for that process. The process Handling Time, in seconds, is the default measure value set. Alternatively any decimal business entity can be set.
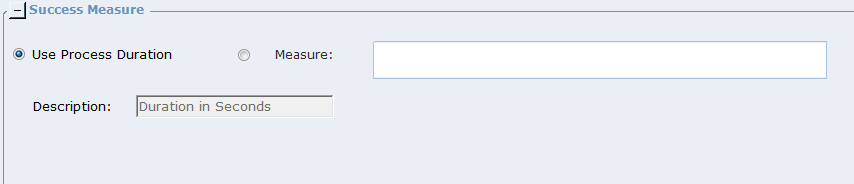
| 8. | Select the Measure option and then click in the Measure field. |
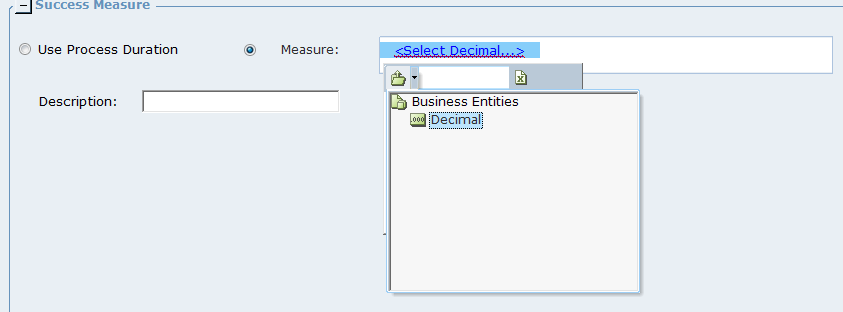
| 9. | Select any Decimal Business Entity as a data source for the Measure value. |
| 10. | Enter a short description for the Measure value. This will be the Measure Type shown in the reports. |
The sum of all Percentage values is always 100%.
| 11. | Repeat Step 7 through Step 10 for each measure. |
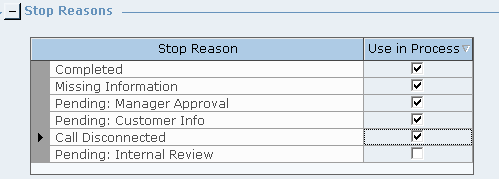
You are now ready to define the process Stop Reasons.
The administrator configures all of the relevant Stop Reasons using the Desktop Work Tracker, and specifies which reasons should be the default ones (see Configuring Process Stop Reasons for Manual Processes for details) However, you may change the default Stop Reasons for each process accordingly to the logical choice..
| 12. | In the Stop Reasons field, select the reasons that should be assigned to this process. |
If a Stop Reason was deleted during the configuration process, it will be displayed with an asterisk and you will not be able to assign it to the process.
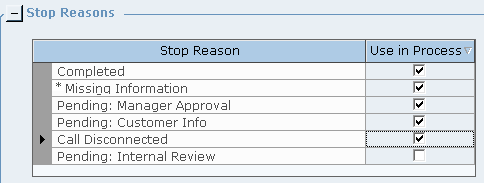
See Configuring Process Stop Reasons for Manual Processes for details.