Connecting to Snowflake Database
RT Designer supports connection with the Snowflake databases, which are available at a cloud resource, such as AWS Cloud, Google Cloud, and Microsoft Azure.
To connect RT Designer with your Snowflake database, you must first configure the Snowflake on your windows machine.
Prerequisites
Before you begin, make sure that following prerequisites are adhered to.
-
Operating System - For a list of the operating systems supported by Snowflake clients, see Operating System Support.
-
Administrator privileges to install the ODBC driver.
-
Visual C++ Redistributable for Visual Studio 2015 is installed on windows machine.
Install and Configure Snowflake ODBC Driver
-
Download the Snowflake ODBC driver and install it. Install the applicable ODBC driver, as given below:
-
snowflake64_odbc-<version>.msi
-
snowflake32_odbc-<version>.msi
-
-
Configure the Snowflake ODBC driver
-
On your windows machine, launch the ODBC Data Source Administrator tool.
-
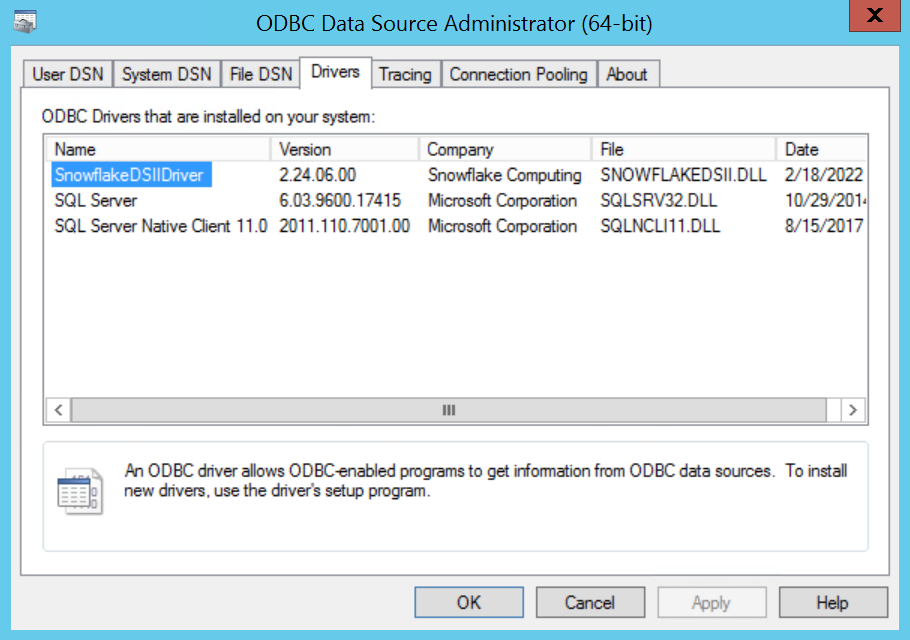
Select Drivers tab. Make sure that Snowflake driver is listed.
If not listed, Snowflake ODBC driver was not installed successfully. Install the Snowflake ODBC driver again.
-
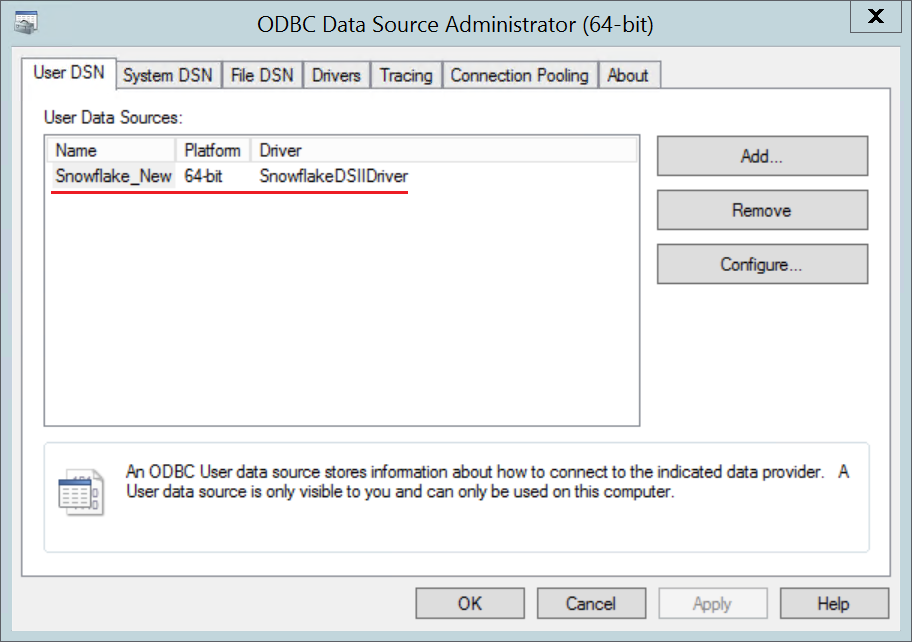
Select User DSN tab and click Add....
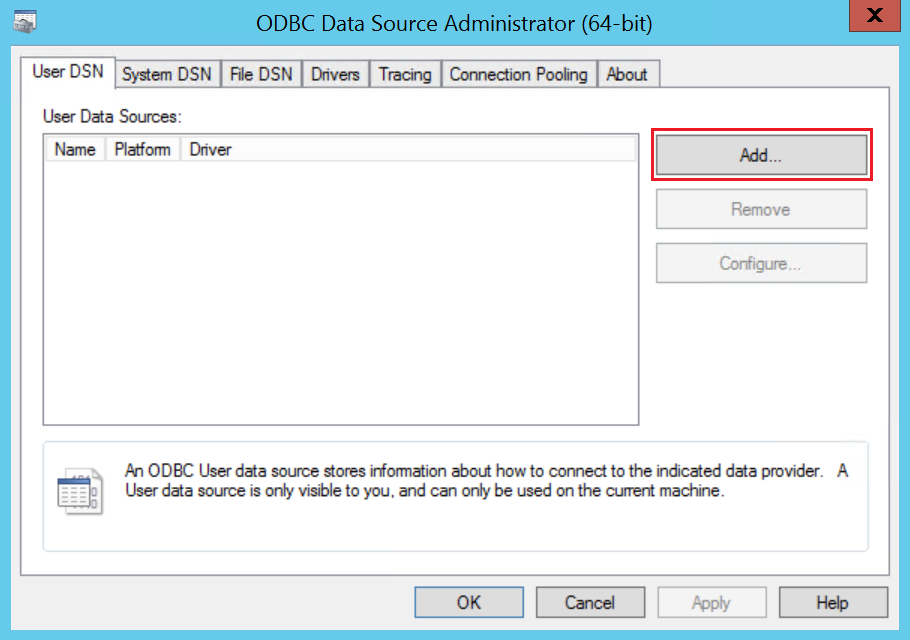
-
Select SnowflakeDSIIDriver from the list and click Finish.

-
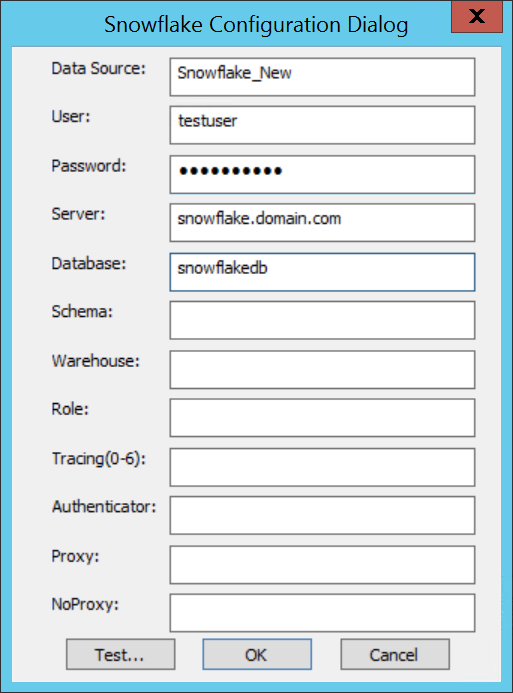
In the Snowflake Configuration Dialog, enter these details:
-
Data Source - Name of the Snowflake data source
-
User/Password - User name and password for connecting to the server. The Password field accepts a value, but does not store the value in the driver.
-
Server - FQDN of the target server
-
Database - Name of the Snowflake database
-
-
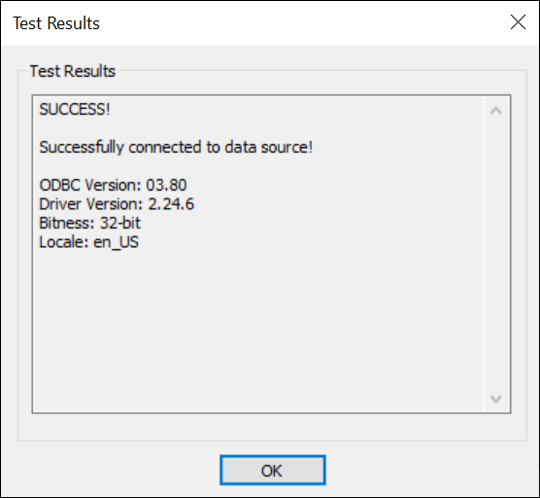
To verify the connection with the provided data source, click Test. A dialog box with success message, as shown in the sample below, appears. Click OK.
-
On Snowflake Configuration Dialog, click OK.
-
On the ODBC Data Source Administrator tool, a new User DSN is created.
-
-
Create a New Local Connection in RT Designer.
-
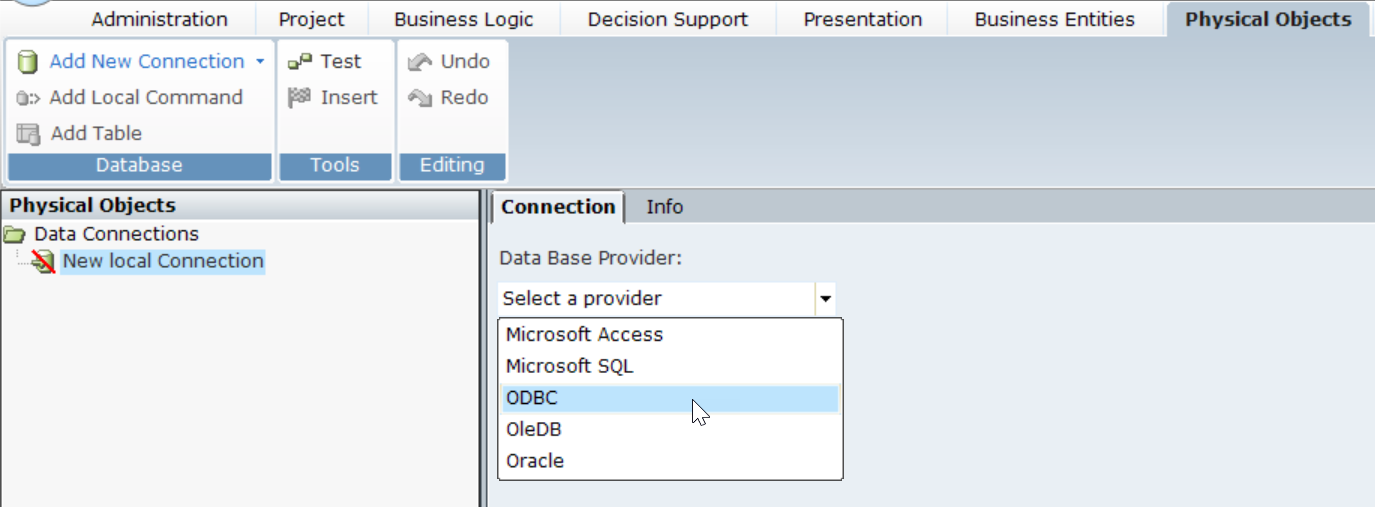
Open RT Designer and navigate to Physical Objects > Database.
-
Click Add New Connection and select Add Local Connection.
-
Click the Data Base Provider drop-down and select ODBC.
-
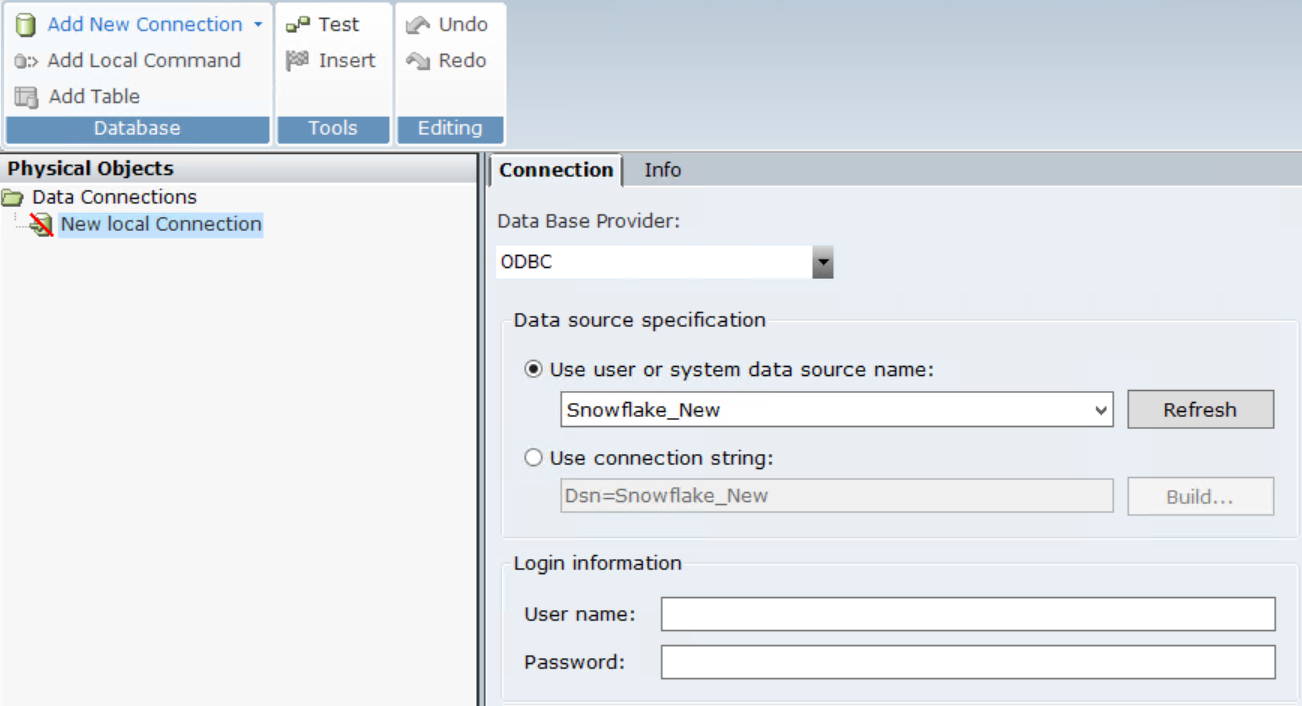
Under Data Source Specification, select Use user or system data source name option.
-
Click the drop-down and select the listed snowflake DSN.
If you do not see the required DSN, click Refresh and try again.
-
Under Login Information, enter the username and password for the snowflake data source and click Test.
Make sure that the test is successful.

-
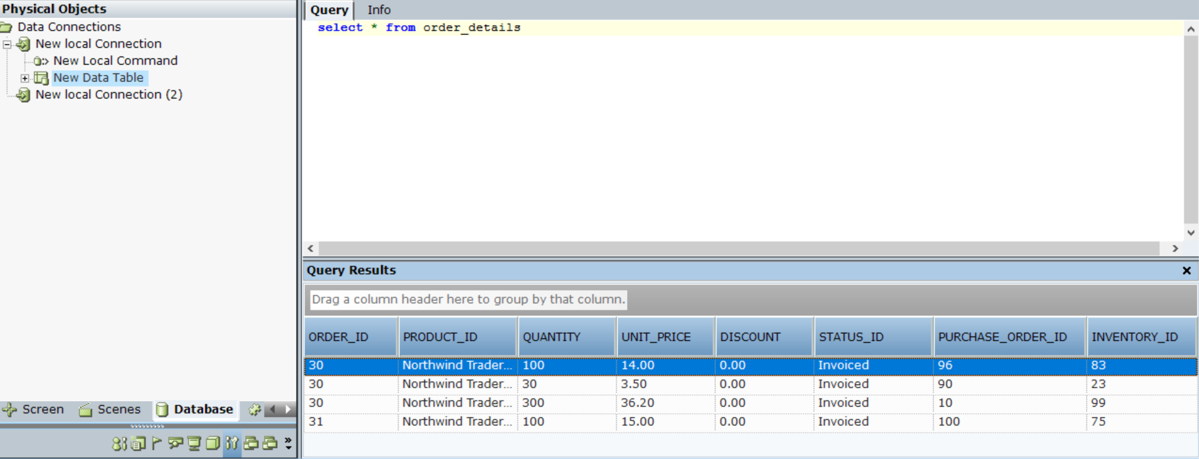
Create a New Local Command and run a query to check that the required data from the data table is fetched.
-