Using the Automation Workflow Wizard
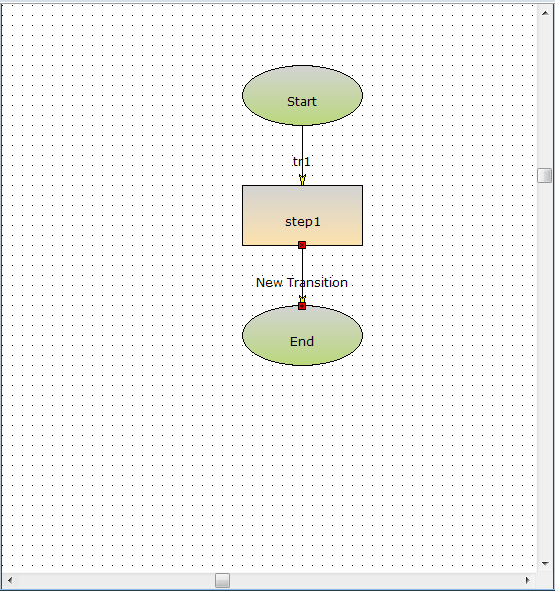
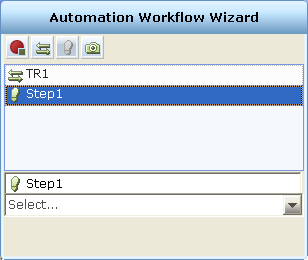
By default, when using the wizard, the main Real-Time Designer window is hidden and only the Automation Workflow Wizard window, shown in Step 1 below, is visible. Once you exit the wizard, the workflow drawing created using the wizard is displayed in the main work area in the Real-Time Designer window.
To create a workflow using the Automation Workflow Wizard:
| 1. | Click Automation Workflow to open the Automation Workflow Wizard. |
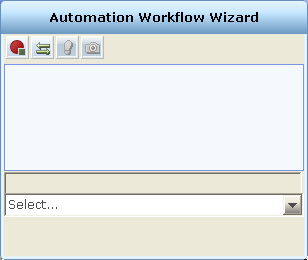
The Automation Workflow Wizard window contains a toolbar with the following tools:
End Wizard  : Closes the Automation Workflow Wizard window, creates the last transition in the workflow (if it does not already exist) and connects this transition to the end point (step). If the last transition already exists, it is automatically connected to the end point (step).
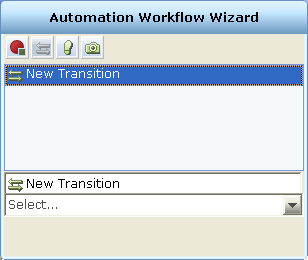
Create Transition ![]() : Creates a transition in the workflow.
: Creates a transition in the workflow.
Create Step  : Creates a step in the workflow.
Screen Element  : Enables you to capture a screen element and connect it to a transition or step in a workflow.
A new row is added to the upper pane of the window. This area lists the transitions and steps defined so far in the workflow. Click a component row to select it. When you select a component in this pane, its name is also displayed in the edit box at the bottom of the window. In addition, an icon is shown next to the component name that indicates the type of component (transition ![]() or step
or step  ).
).
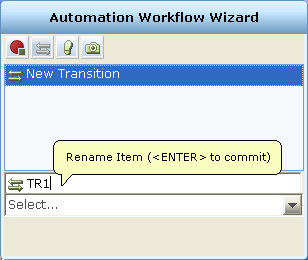
After you create the transition, you can edit it to change its name, connect it to a screen element, or create a new step.
To rename the transition, click the edit box and then type in a new name for the transition.
To connect the transition to a screen element, refer to Connecting a Transition or Step to a Screen Element.
| 3. | Click the Create Step  button to create a step in the workflow. The step is automatically linked to the previous transition. button to create a step in the workflow. The step is automatically linked to the previous transition. |
After you create the step, you can edit it to change its name, connect it to a screen element, or create another new transition.
To rename the step, click the edit box and then type in a new name for the step.
To connect the step to a screen element and define its action, refer to Connecting a Transition or Step to a Screen Element.
| 4. | [Optional] Once you have defined a step, you can return to a previously defined transition and change it, if required, as described in Connecting a Transition or Step to a Screen Element. |
| 5. | Repeat Step 2 through Step 4, as needed, to define the workflow. |
| 6. | Click the End Wizard  button. The Automation Workflow Wizard window closes and the workflow diagram is displayed in the Real-Time Designer window. If the transition to the end point (step) does not exist, it is automatically created and connected to the end point (step). If the last transition already exists, it is automatically connected to the end point (step). button. The Automation Workflow Wizard window closes and the workflow diagram is displayed in the Real-Time Designer window. If the transition to the end point (step) does not exist, it is automatically created and connected to the end point (step). If the last transition already exists, it is automatically connected to the end point (step). |