


Enabling Real-Time Designer to Work with Terminal Connector
Before you can capture an HLLAPI object in the Terminal application, you must install the Terminal connector.
To enable the Real-Time Designer to work with Terminal Connector
| 1. | Complete the Real-Time Designer installation process. For more information, see the Real-Time Client and Designer Server Installation Guide. |
| 2. | Start Real-Time Designer and select the Business Objects tab. Terminal Emulation is selected by default in the Connectors Enabled for Capture drop-down list:. If required, to disable Terminal connector, clear the Terminal option. |

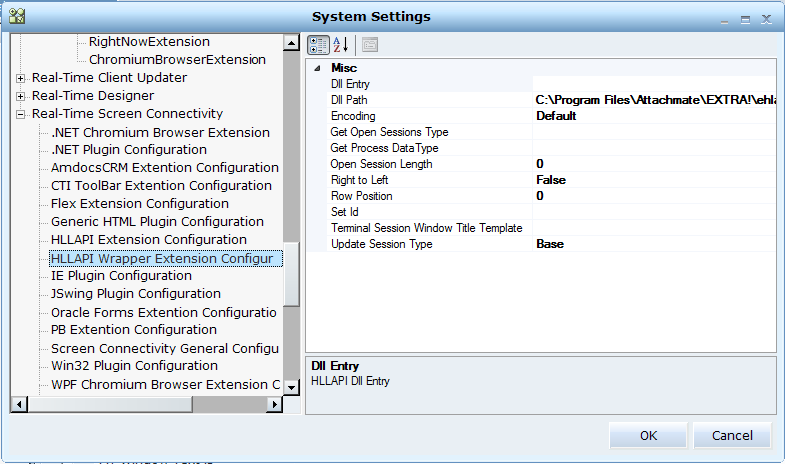
| 3. | If you need to customize for use with different Terminal emulators, configure the HLLAPI Extension Configuration and HLLAPI Wrapper Extension Configuration sections in the Real-Time Designer’s System Settings window. By default, the Real-Time Designer and Client are configured to work with the EXTRA Terminal Emulator. |

For more information about the Terminal connector’s system settings, see HLLAPI Extension Configuration and HLLAPI Wrapper Extension Configuration sections in the Real- Time Solutions System Administration guide.
When running the EXTRA Terminal Emulator application, you must make additional settings in order to capture the HLLAPI objects. Real-Time Designer provides the connection to the EXTRA Terminal Emulator’s API automatically.
Make sure that Dll Path to ehlapi32.dll under the Terminal Emulator’s installation folder is correct in the HLLAPI Wrapper Extension Configuration section in both the Real-Time Client and Real-Time Screen Connectivity nodes in the System Settings window. By default, the Dll Path value is C:\Program Files\Attachmate\EXTRA!\ehlapi32.dll.
| 4. | In RTDesigner.exe.config file, the Terminal connector’s settings can be found under the </configuration> section: |
<screenPluginTerminalConfig Extensions_Section="TerminalPluginEnumerator" />
<TerminalPluginEnumerator displayName="Terminal Plugin Enumerator">
<directPlugins displayName="Terminal Extensions">
<add name="HLLAPI" assemblyName="Connectivity.Terminal.HLLAPI.Extension.dll" typeName="Connectivity.Terminal.HLLAPI.Extension.HLLAPIExtension" />
</directPlugins>
</TerminalPluginEnumerator>
<hLLAPIExtensionConfig assemblyName="Connectivity.Terminal.HLLAPI.Wrapper.dll" typeName="Connectivity.Terminal.HLLAPI.Wrapper.HllapiWrapper_BlueZone" Terminal_Process="EXTRA" Start_Row="24" End_Row="24" Start_Column="71" End_Column="78" Terminal_Session="A" Terminal_Class="Afx*" Force_Disconnect="false" With_Queue="false" />
<hLLAPIWrapperConfig Dll_Path="C:\Program Files\Attachmate\EXTRA!\ehlapi32.dll" Update_Session_Type="Base" />
You can now capture an HLLAPI screen element type (see Capturing a HLLAPI Screen Element ).